Warning: autorecording must be always ON on MyStreamingVideo if someone uses 3rd party broadcasters and wants to record their live session with MyStreamingVideo.
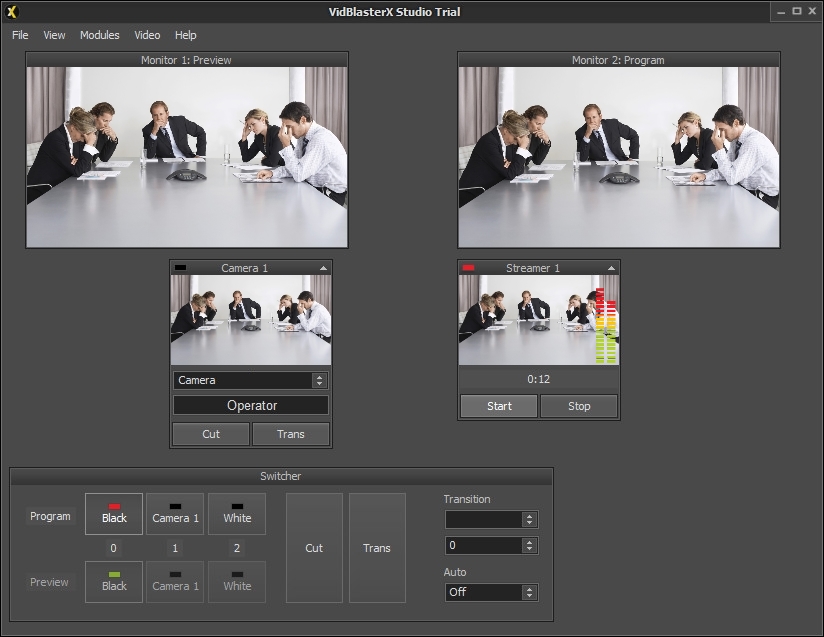
Once the application has been successfully installed you must follow the below steps to go LIVE with VidBlasterX:
1. Here you can view the video feed from your camera.
2. From this drop-down menu you can select the video source that you want to stream on the channel.
3. Here you can preview the video feed that you will stream on the channel.
4. Here you can view the video feed that will be streamed on the channel – this is the main module from where the feed is streamed.
5. This is the monitor where you can see how the stream will look like
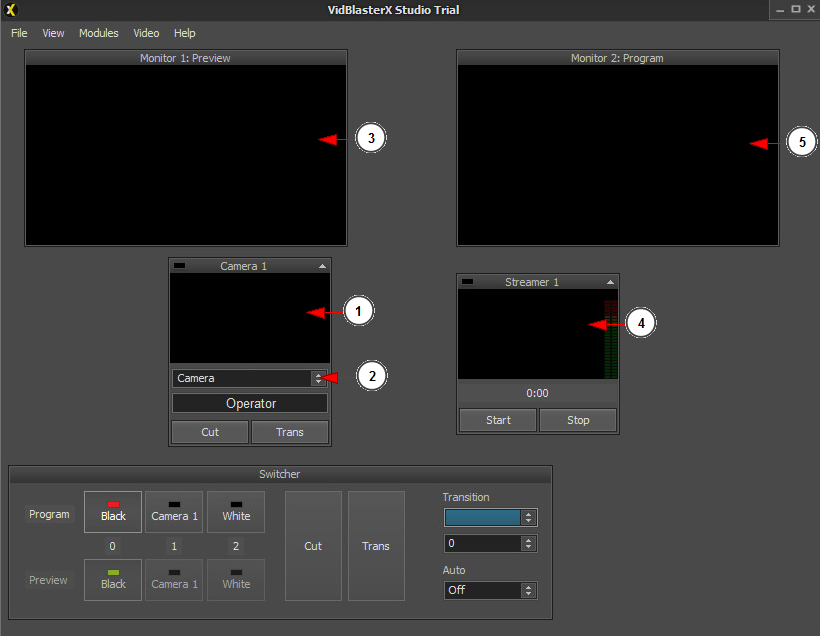
You will need to set the source on the “Streamer” module as in the following picture:
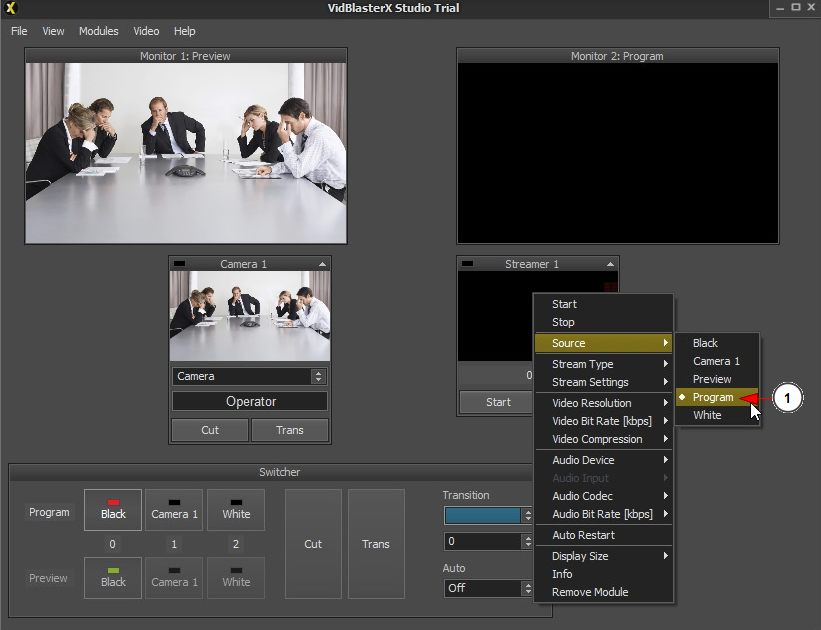
1. In order to properly set the video feed, you will have to right click on “Streamer 1” and select “Source” – “Program” option.
After you have set the video feed source, you need to set the server streaming URL:
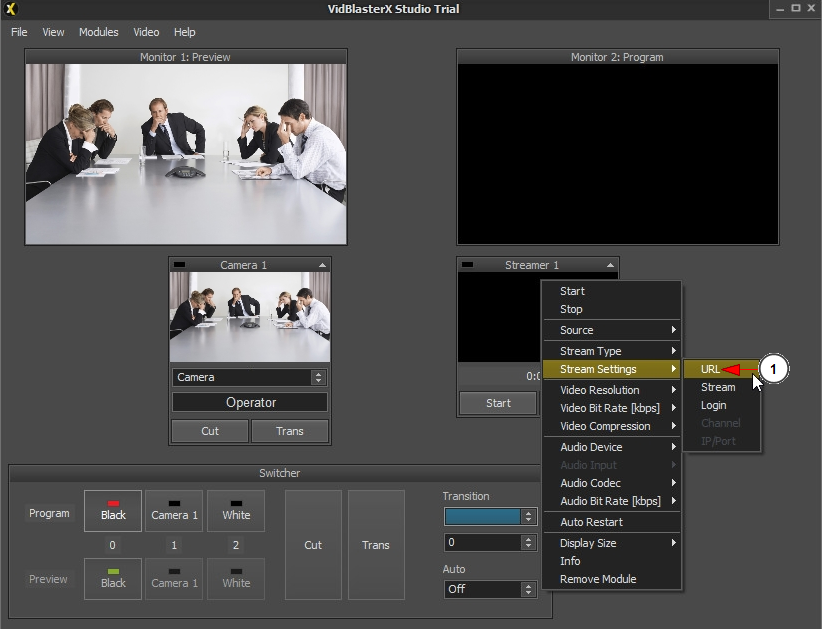
1. Right click on “Streamer 1” and select the “Stream Settings” – “URL” option.
On the overlay window enter the RTMP Server URL – this is taken from Broadcast Options page:
1. Enter here the RTMP Server Address that you copied from Broadcast Options page.
2. Click on OK button to save the Server URL.
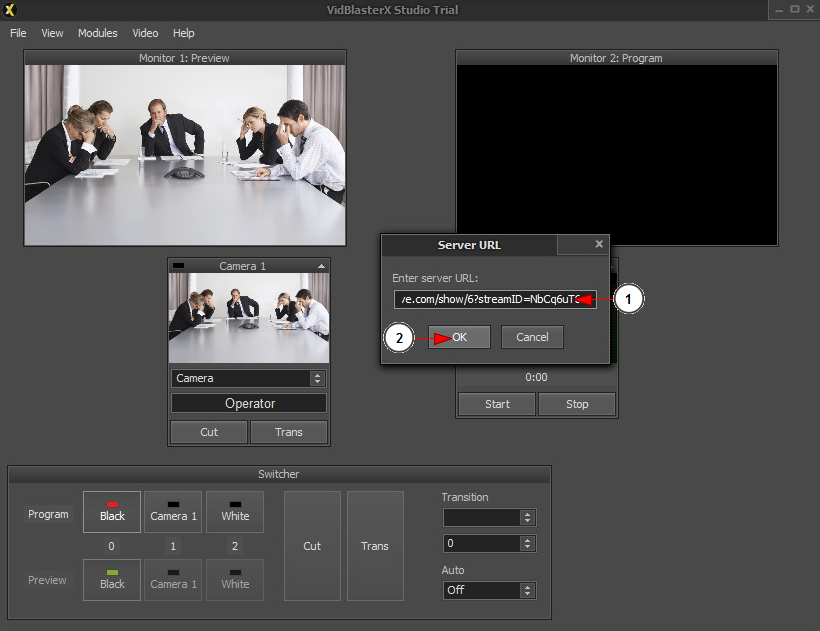
After you have set the Server URL, you need to set the stream name:
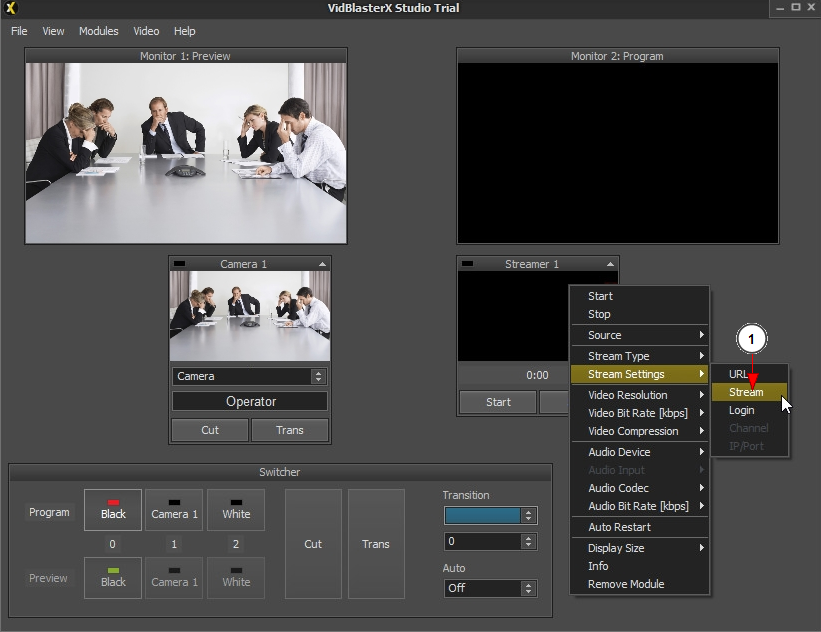
1. Right click on “Streamer 1” and select the “Stream Settings” – “Stream” option.
On the overlay window enter the RTMP Stream Name – this is taken from Broadcast Options page:
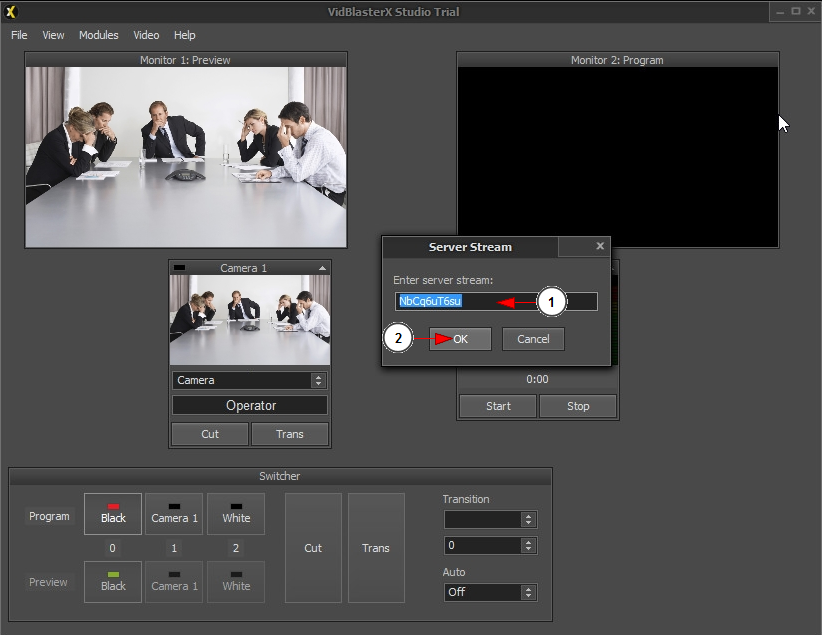
1. Enter here the .RTMP Stream Name that you copied from Broadcast Options page.
2. Click on OK button to save the Stream Name.
You can adjust the resolution of the video source that you want to stream on the channel by following the steps from the image:
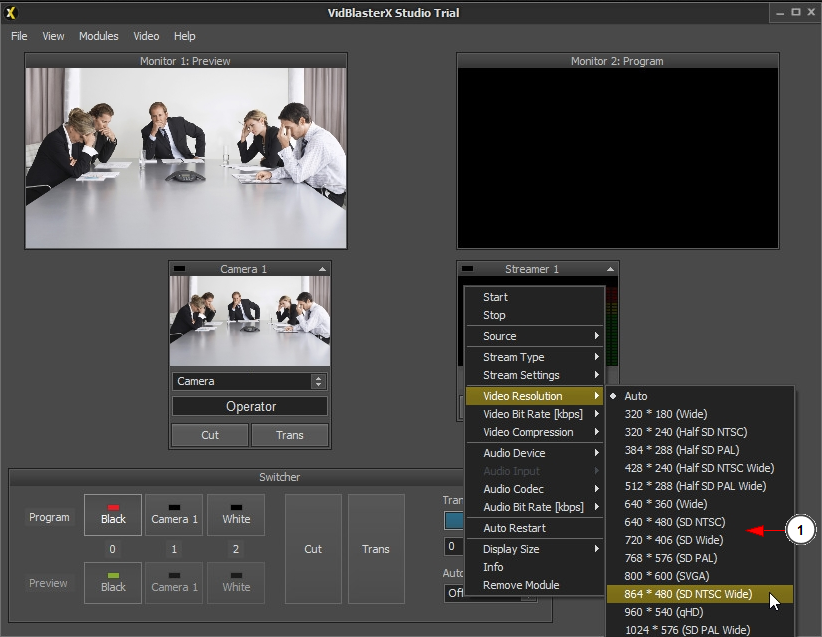
1. Right click on “Streamer 1” and from “Video Resolution” select the resolution that you want to stream.
You can select the audio source that you want to stream on the channel by following the steps from the image:
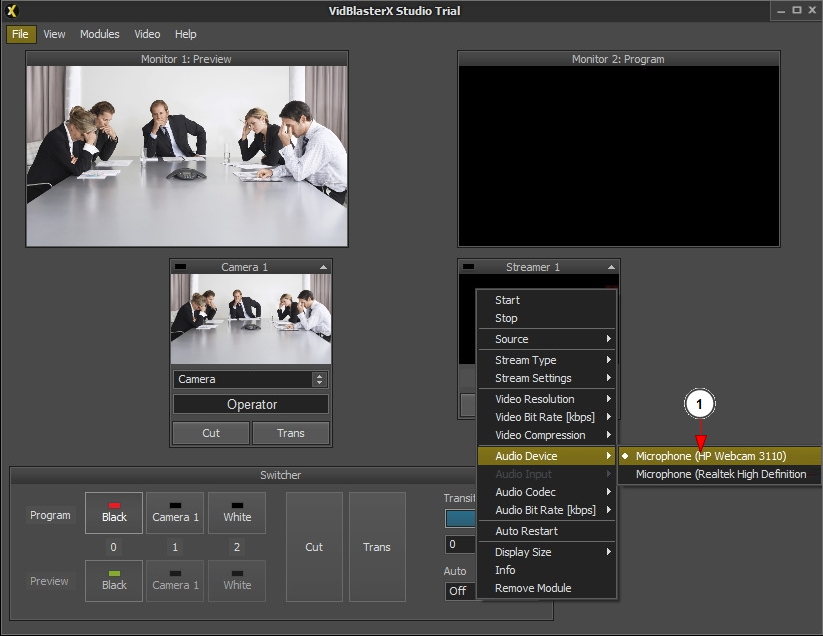
1. Right click on “Streamer 1” and from “Audio Device” select the source of the audio that you want to stream.
Another important step is to select the AAC as audio codec:
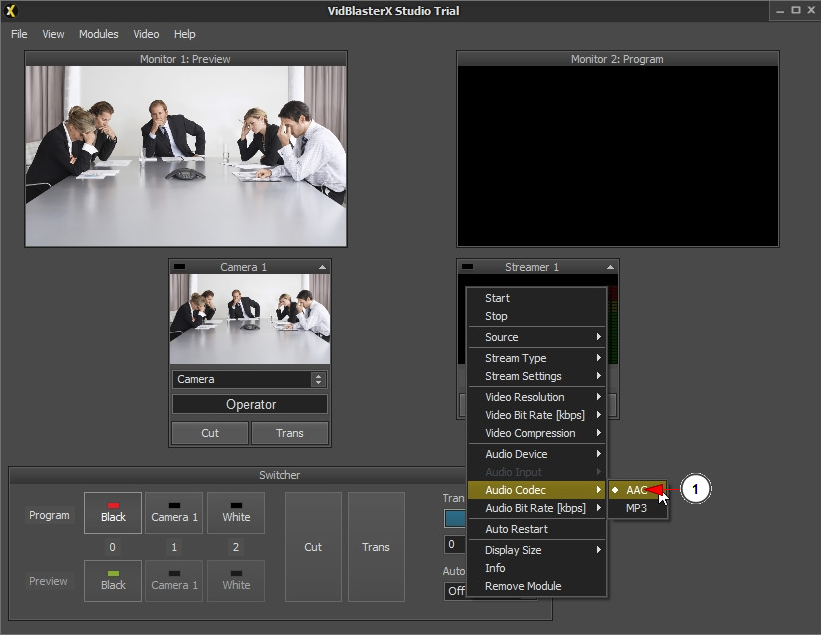
1. Right click on “Streamer 1” and from “Audio Codec” select the “AAC” option.
After you have performed all the steps, you will need to click on Start broadcast:
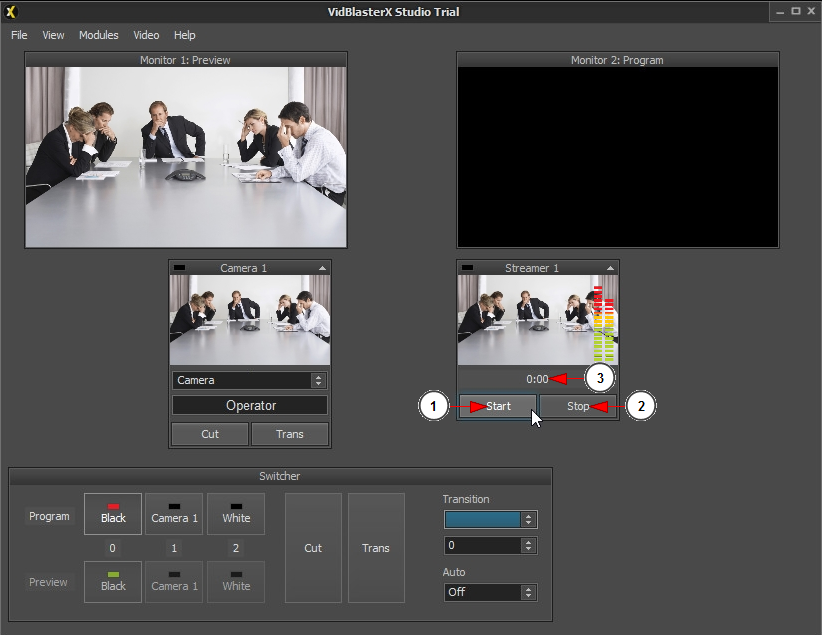
1. Click here to start the stream.
2. Click here if you want to stop the stream.
3. Here you can view the counter that shows you how long you were streaming Live.
After you have performed all the steps and started the stream the VidBlasterX application will stream the video on your MyStreamingVideo channel: